
THE VESSEL
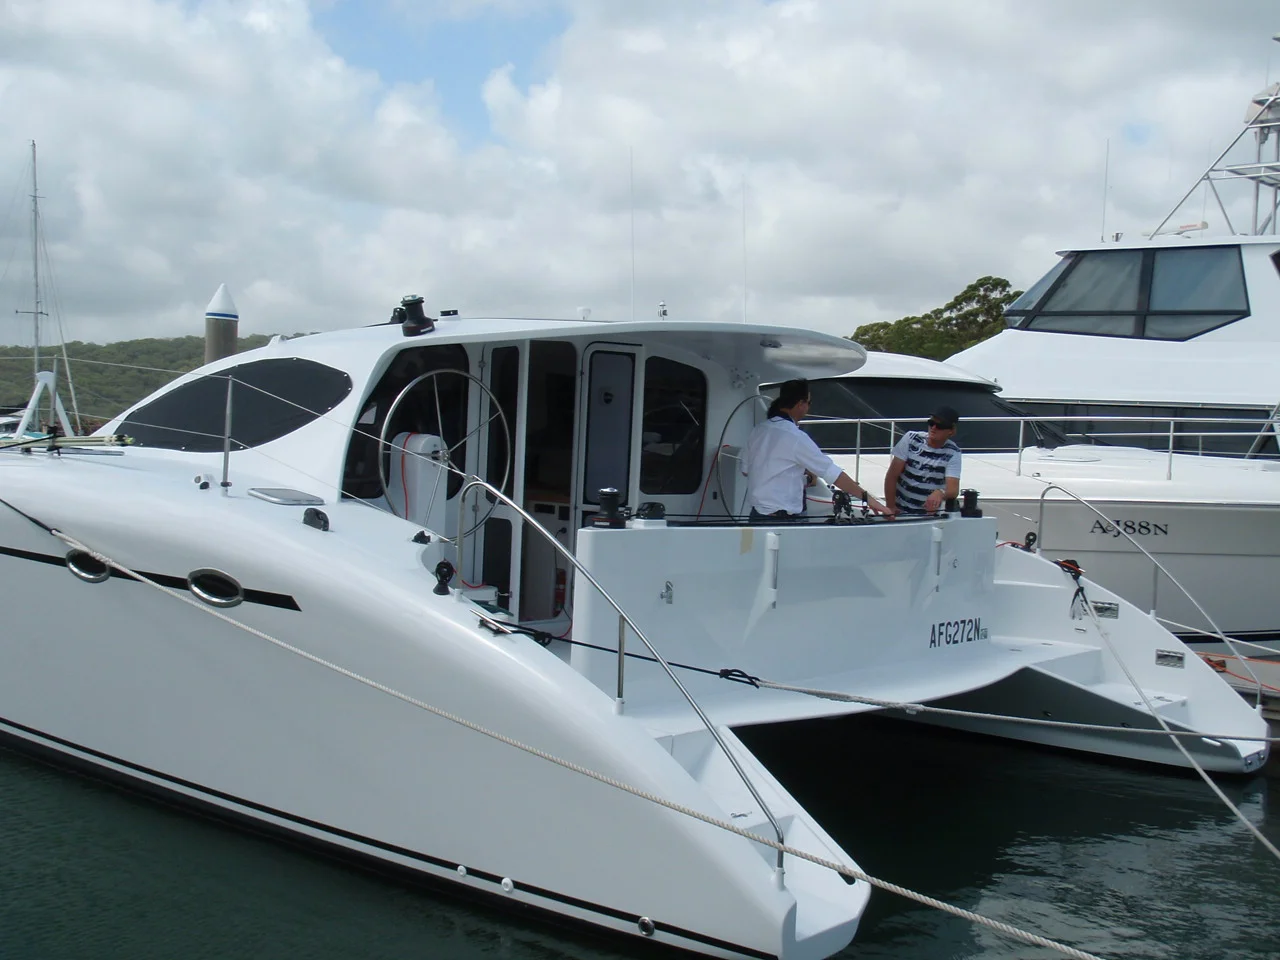
ROAM is the first launched Spirited 480 designed by Craig Schonning and built by the Hoult family on the East Coast of Tasmania, Australia.
With design tweaks by owner Michael Hoult she has been made to be the ultimate surf adventure vehicle.
ROAM tour - 2015
Long term, Sustainable, Low Impact travel is the focus of ROAM.
Think "Off Grid", we are 100% solar powered for our electric supply. ROAM features a huge 1.1kW solar array.
Think "Wind Energy", the sail plan and deck hardware have been carefully selected to allow efficient sailing in all weathers. From the strong winds of the Roaring 40's to ultra light conditions experienced around the equator ROAM will be able to travel under renewable wind power alone.
This all adds up to seldom use of Roam's diesel powered auxiliary propulsion and makes for ultra low emission, "Low Impact" travel.
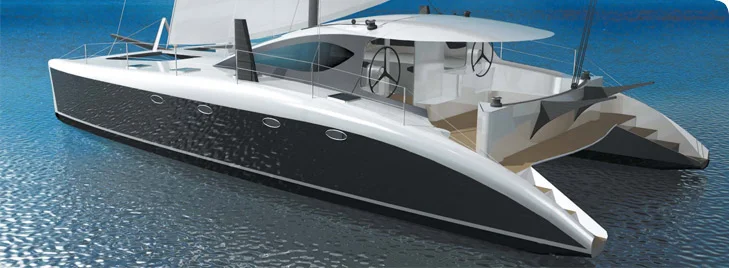
Original Spirited 480 concept renders courtesy of Spirited Designs.
Original Spirited 480 concept renders courtesy of Spirited Designs.
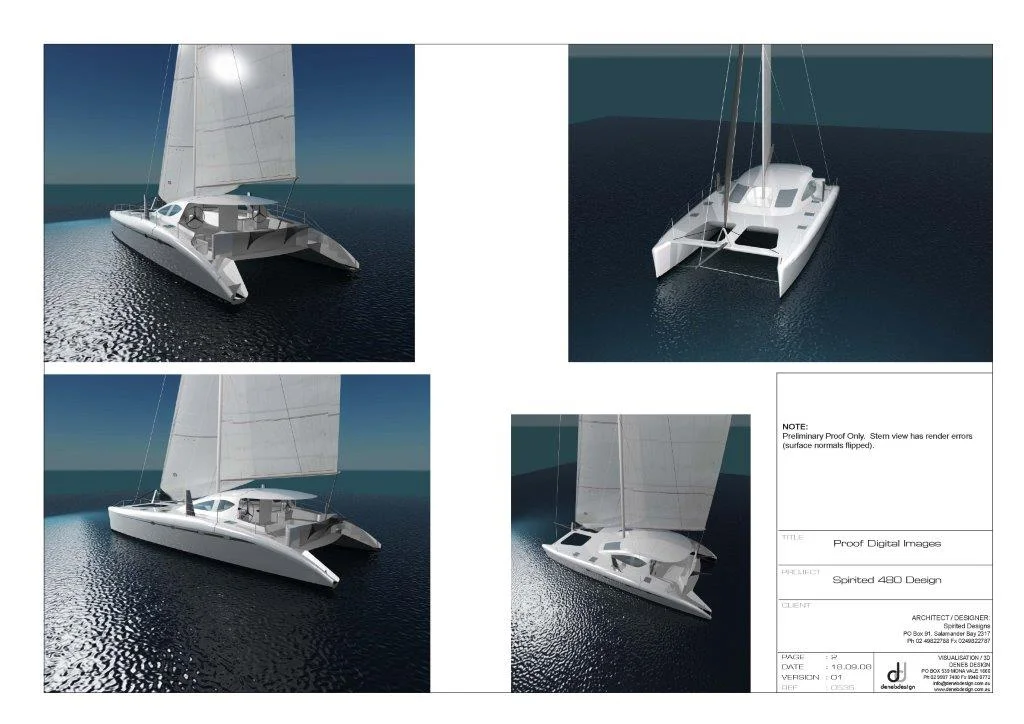
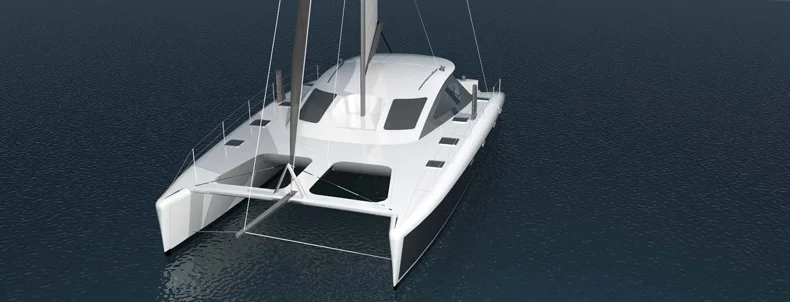
From design concept in 2008 to launch in 2015 ROAM is true to Spirited 480 design. Image Spirited Designs.

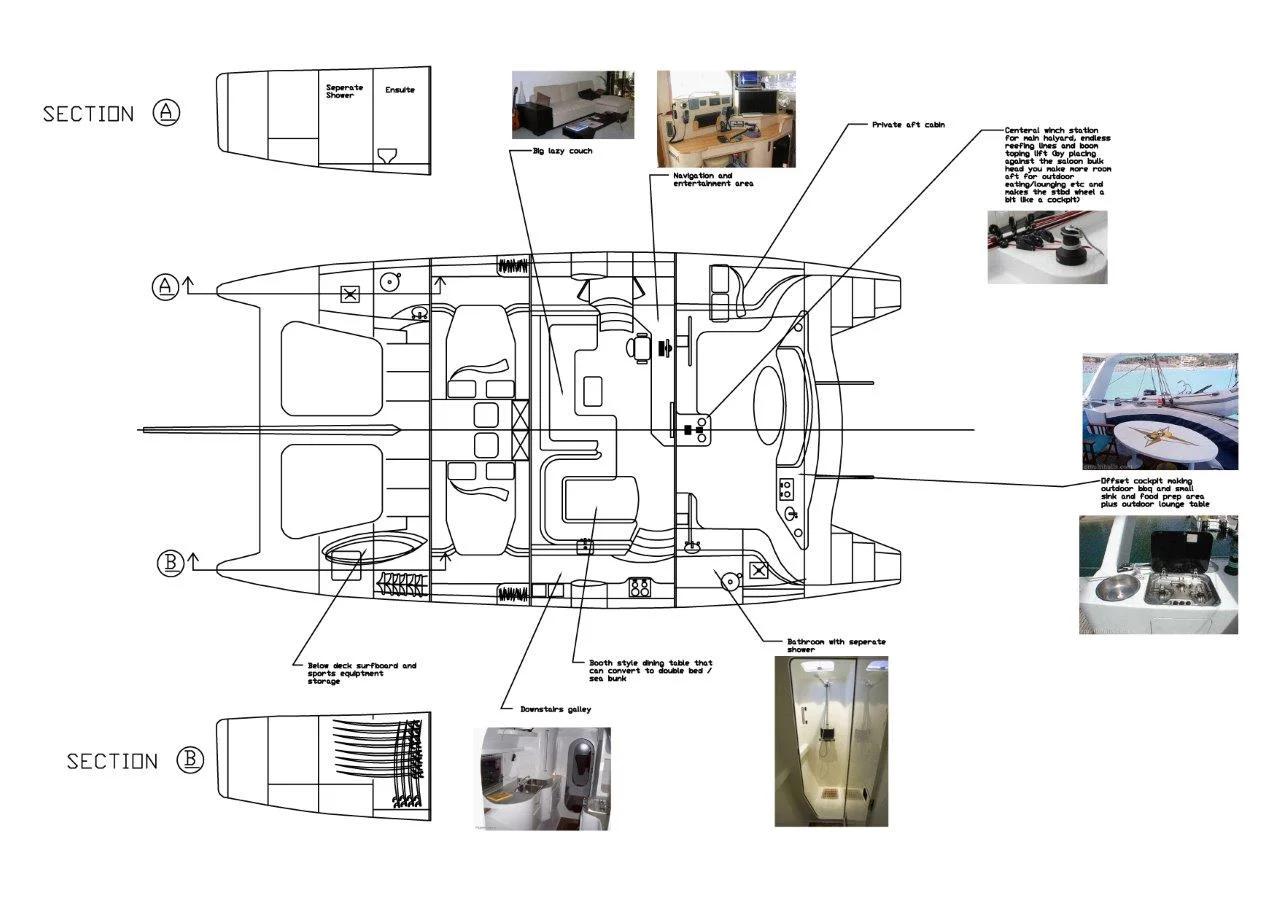
Roam's Custom Interior Layout as modified by Michael. Courtesy of Spirited Designs.
THE BUILD
Michael talking boats with Craig and Marina Schionning onboard a newly launched Spirited 380. Port Stephen's NSW. Late 2008.
Michael's sketch for his design for ROAM's layout as provided to Craig at Spirited Designs for quote. Dec 2008.

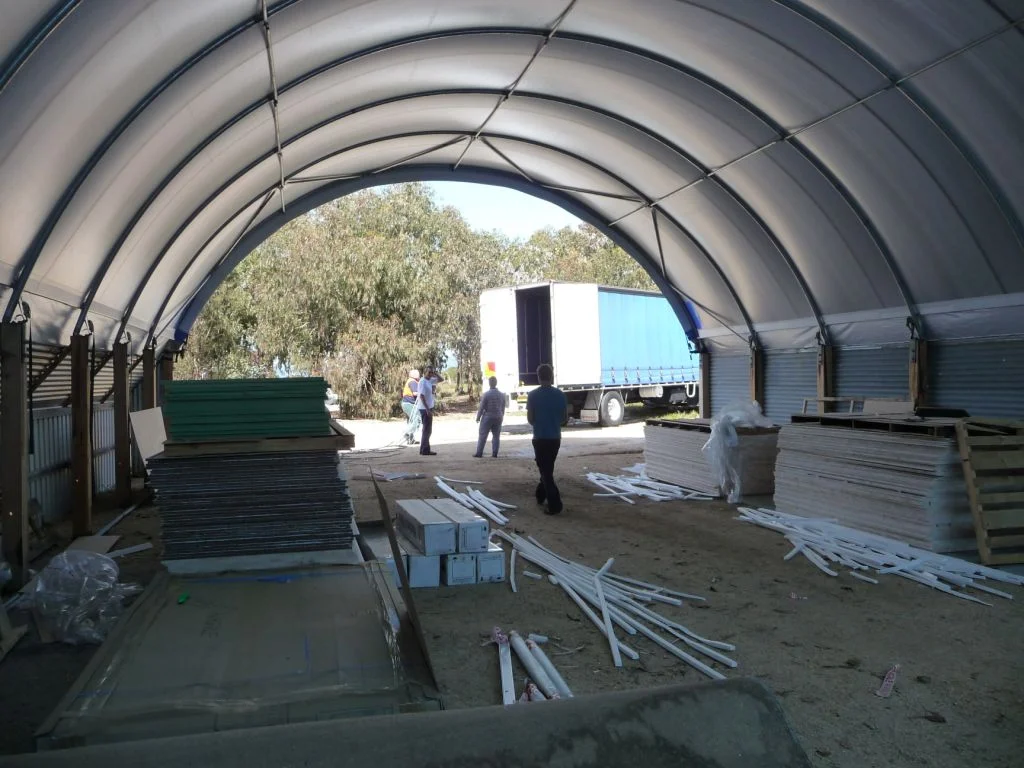
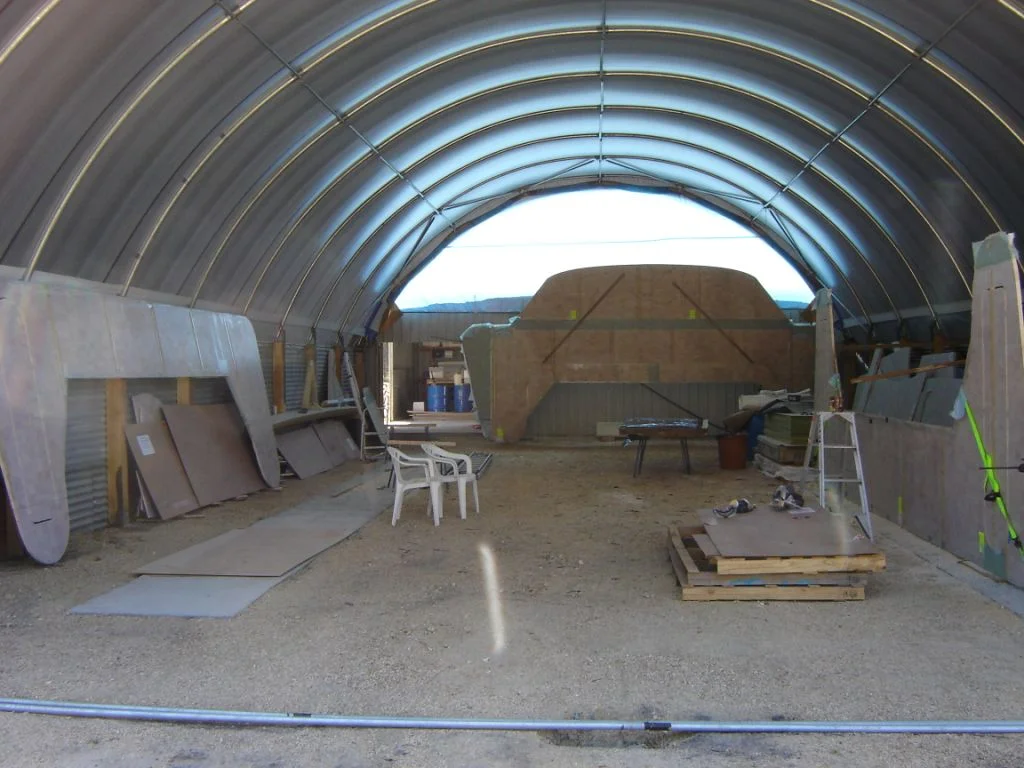
Building the shed. A temporary option was decided to be the best option for us. The lack of a full cement slab didn't cause too much of an issue but did make dust management more of a challenge during fairing and painting of the boat. December 2008.
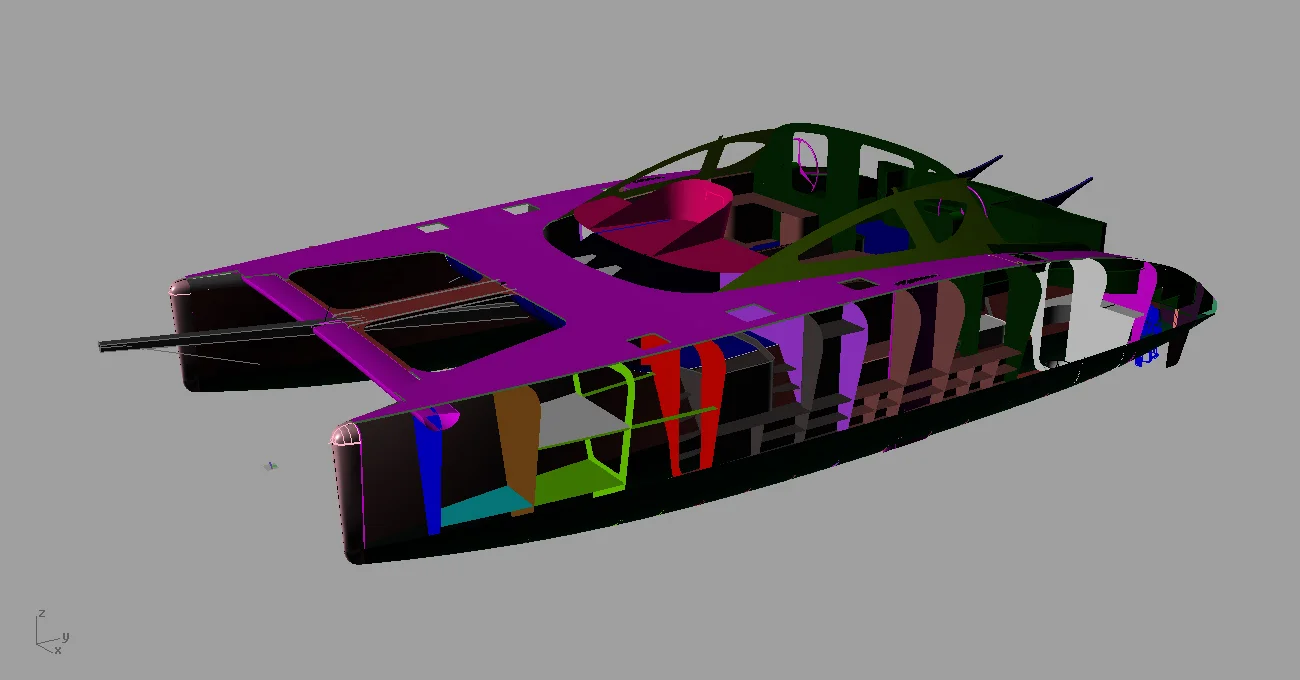
The 3D model of ROAM as produced by Spirited Designs. From this file the parts for the entire boat from the full hull side to the smallest furniture shelf are nested and CNC cut into the composite panels produced by ATL Composites. The design was finalised by March 2009.

Kit Stage 1. Forebeam, Dagger Boards and Cases. Here John is resin coating the strip planked forebeam in preparation for the fiberglass laminating schedule. March-September 2009.
Stage 2 Kit arrives. Pictured is the flat composite panels from ATL Composites for the entire boat. DuFlex balsa E Glass panels for the structure, FeatherLight E Glass panels for the furniture and Airex foam for the cabin roof and appendages. October 2009.

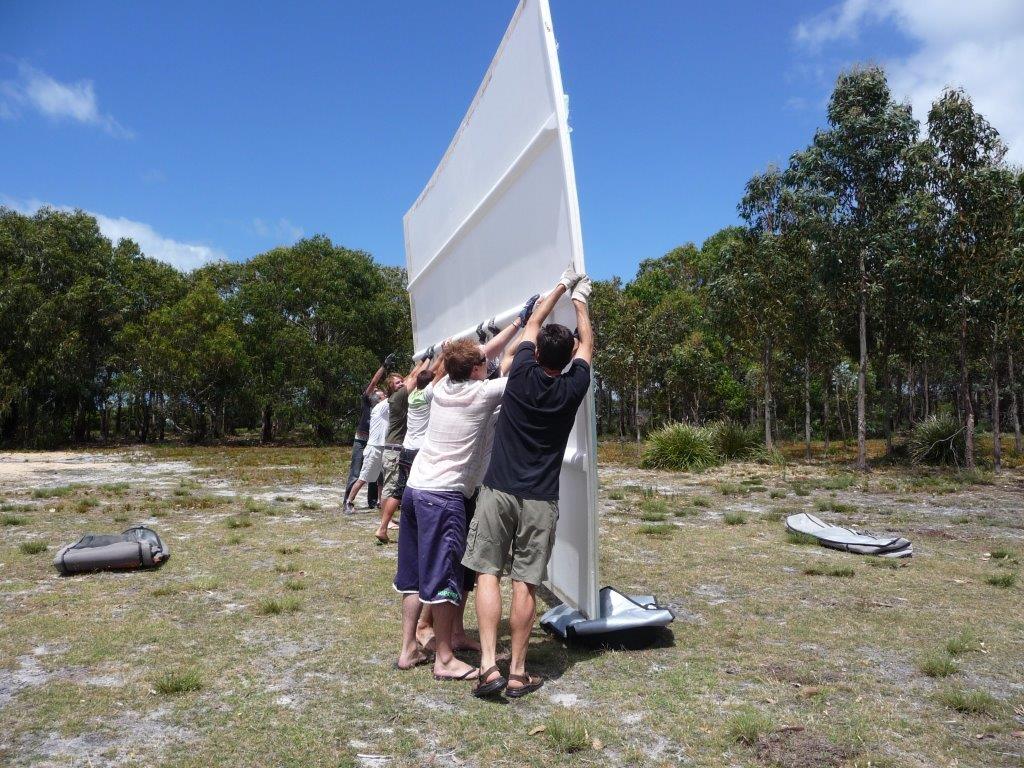
Joining Precut Duflex panels via "batten" method. Our remote location in North East Tasmania did not allow access to the ATL Z Press. We took 3 weeks to complete joining all 178 2.4m x 1.2m panels. November 2009.
Finishing major parts. There are additional solid glass reinforcements and additional laminating schedules to be added to many of the major frames and panels prior to general assembly of the boat. Summer 2009/2010.
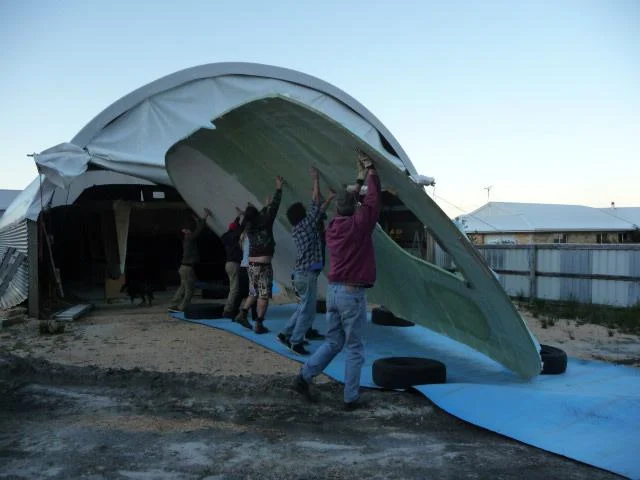
Bridgedeck overturning after underside preparation. The panel is made from 25mm DuFlex and measures 9m x 4.2m. January 2010.

Stage 3 Kit arrives. Moulded Components from Spirited Designs. The resin infused components allow the boat to be assembled on site "right way up" as the hulls were pre fabricated for us at the Spirited Factory in Port Stephens New South Whales by Craig Schionning and road transported to Tasmania. April 2010.

Full kit ready for main assembly. Literally the whole boat is in this picture. April 2010.

General Assembly. This is the starboard hull "chamfer" panel being glued on and held in place with temporary fasteners. Once this is bonded to the frames with West System epoxy it is then laminated to the structure with West System and E Fiberglass double bias fabric tapes. May 2010.
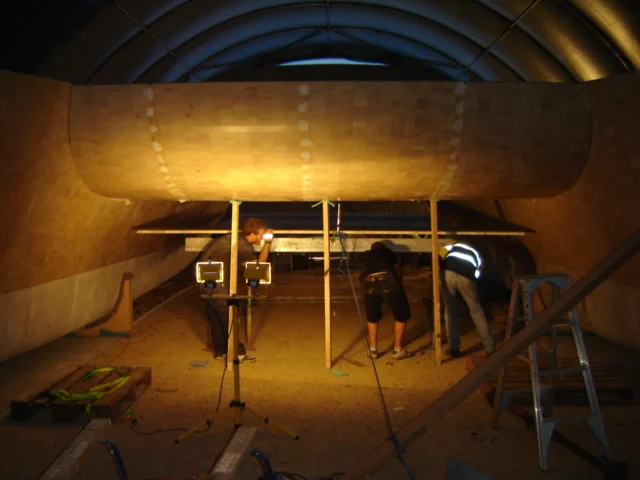
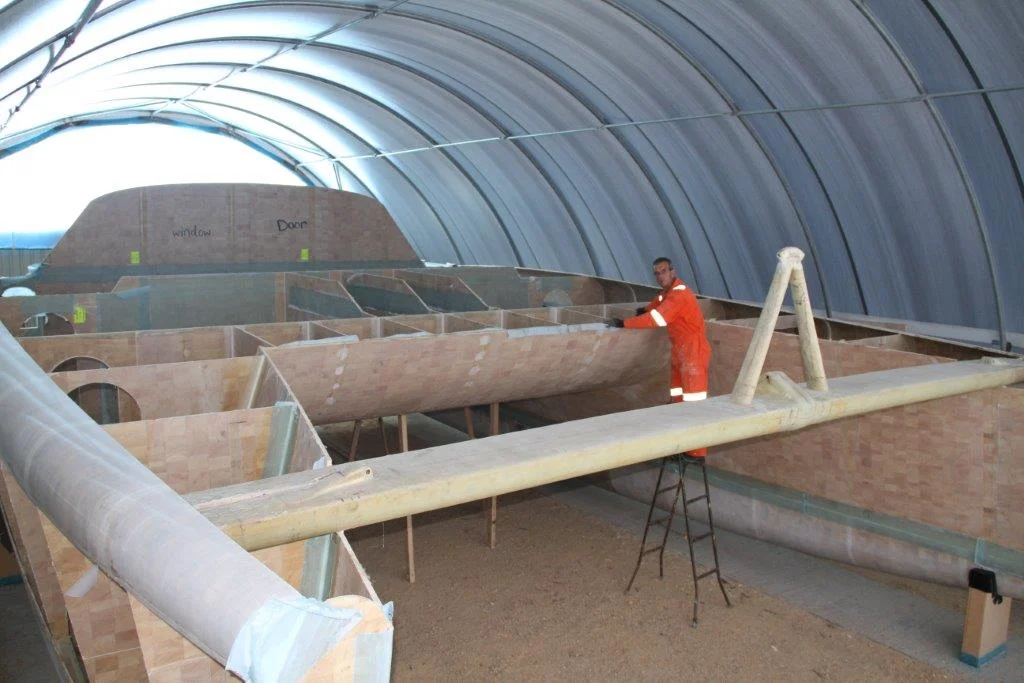
Raising the bridgedeck panel into place for bonding and glassing with Acro Props. We completed the main assembly in 10 days. It was one of the most rewarding times of the build as the boat goes from a pile of parts to a defined structure you can move within. May 2010.
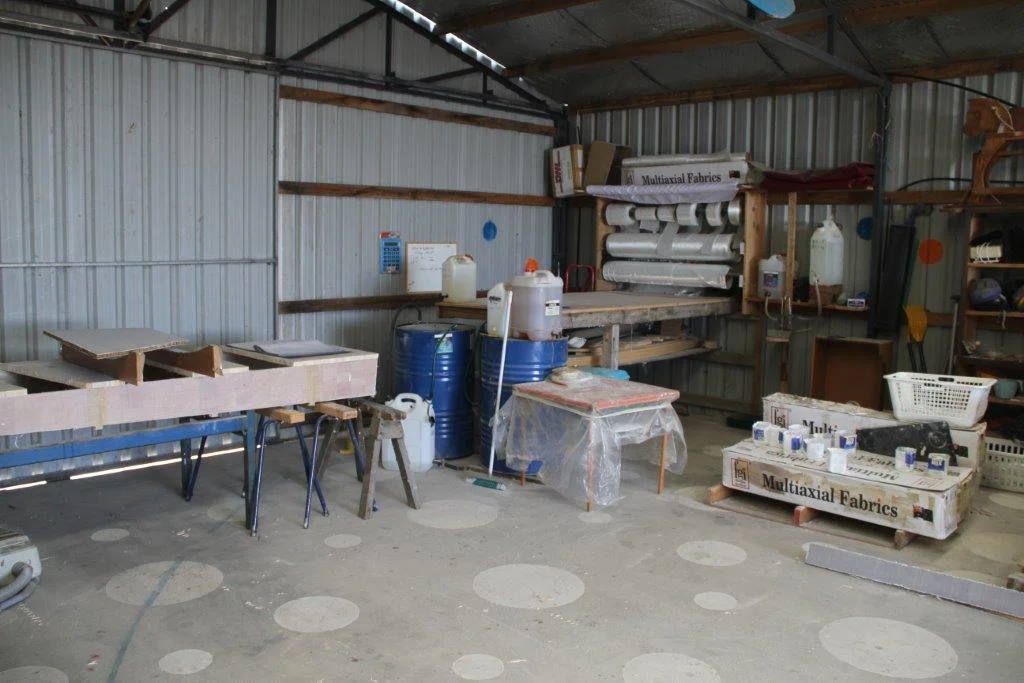
Our fiberglass section of the workshop. This is the 10m x 13m shed of John's that we built the 10m x 18m boat shed immediately adjacent to. Pictured in June 2010.
Main Structure progressing. After the basic assembly taking just 10 days there is then literally 100's of meters of structural joins to fiberglass "tape". We did not rush through this stage as quality leads to higher integrity of the vessels main structure. The use of peel ply assists in producing a consistent high standard workmanship. July 2010.

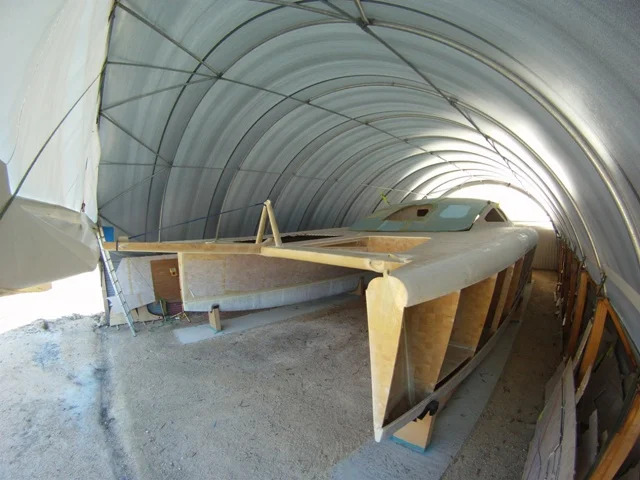
Decks glassed on and Cabin Sides in place. December 2010.
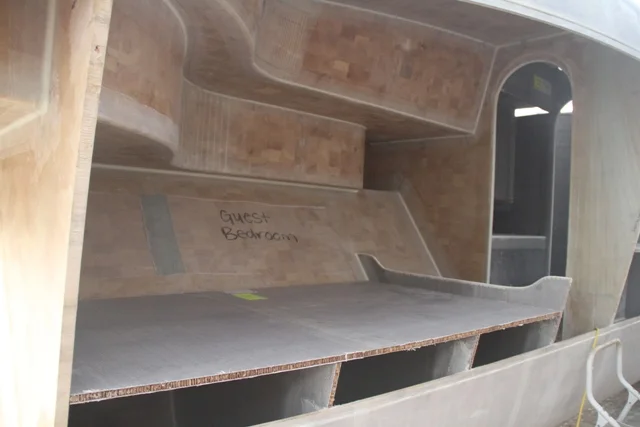
Furniture going in. This is the aft cabin looking from outside the boat before the hull sheer panel was installed. Interior spaces becoming defined allows for you to get a feel of the finished product. April 2011.
Rolling the cabin roof after completing the underside off the boat. This was the largest laminating job of the build. Hand lay up of the 4m x 10m panel. September 2011.
Cabin Roof dry fitted back on the boat ready for final alignment and glassing. October 2011.
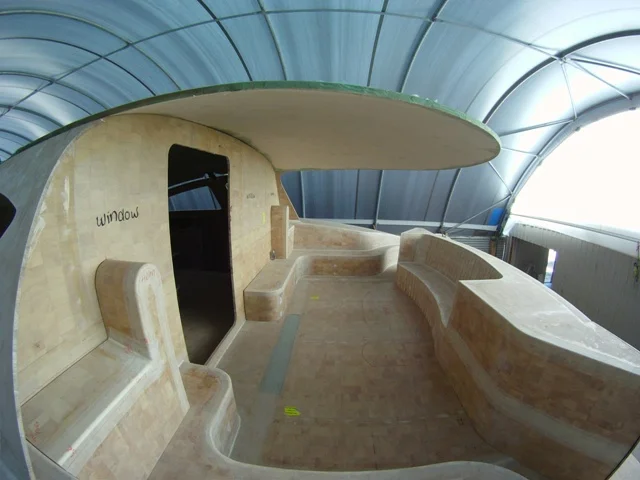
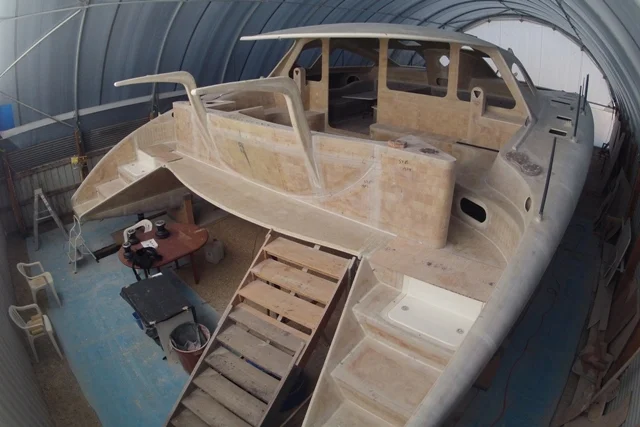
Cockpit taking shape and looking neat. October 2011.
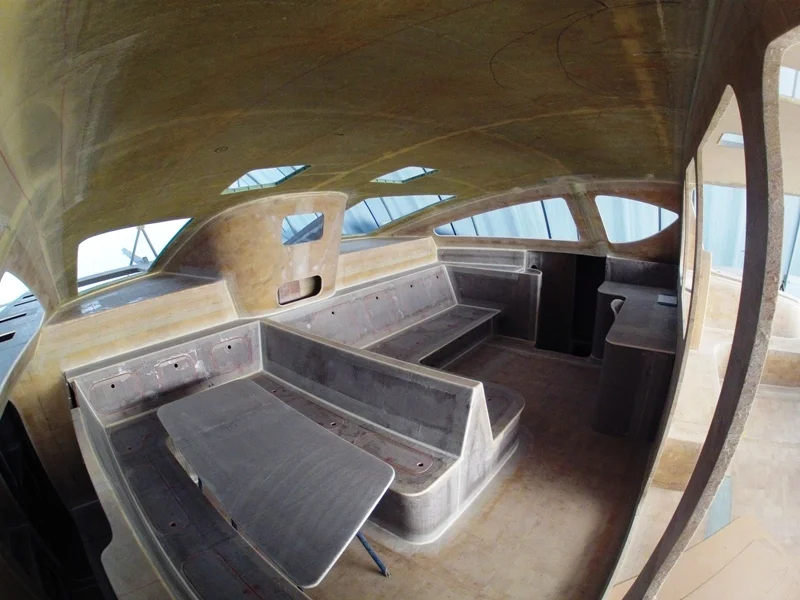
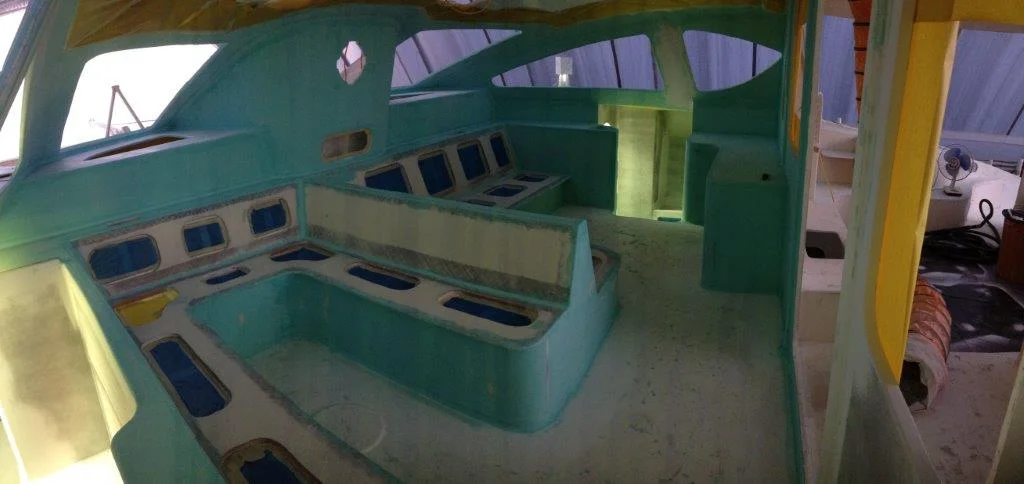
Saloon and internal furniture nearing structural completion. June 2012.
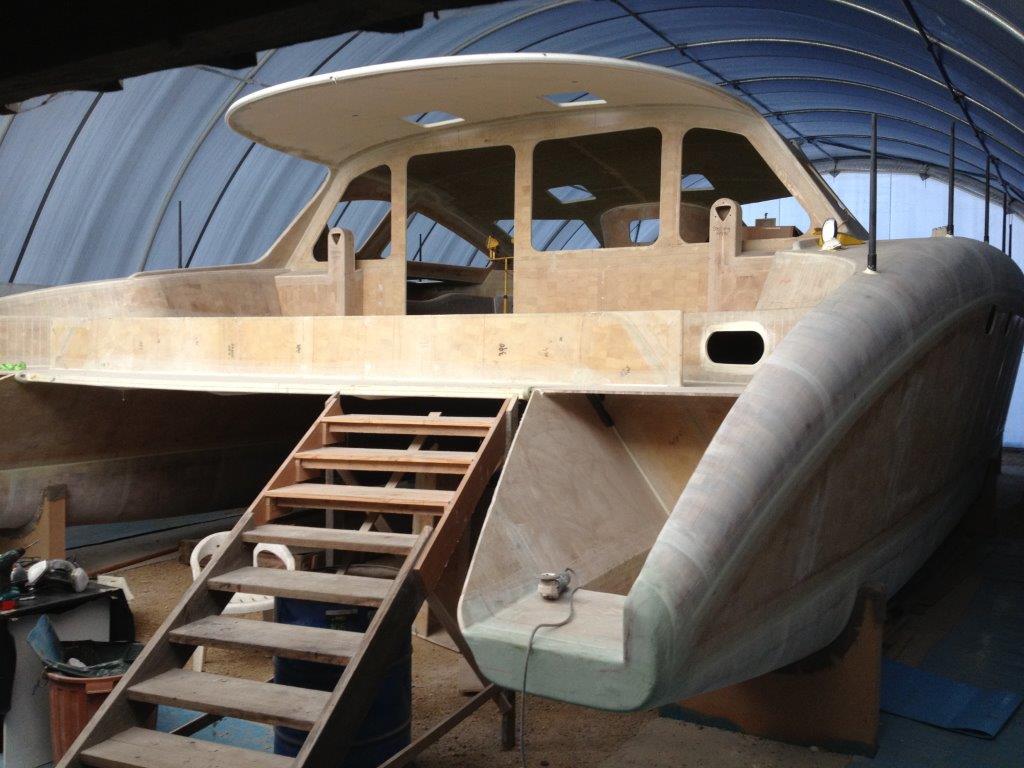
Hull sides on and aft cockpit module off for finishing. June 2012.
Cutting and fitting hatches and windows, bows formed and glassed. June 2012.
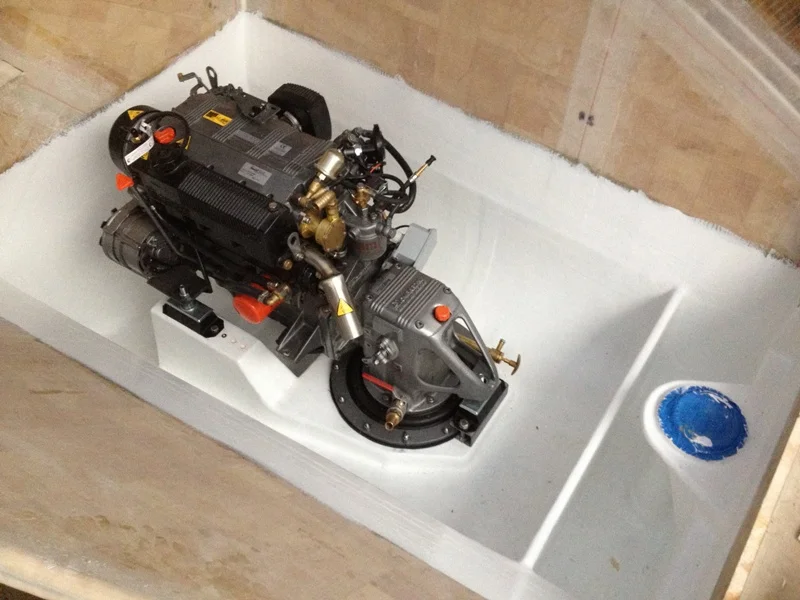
The 40hp Lombardini diesel motors fitted into the boat. Rudder bearings also in. October 2012.
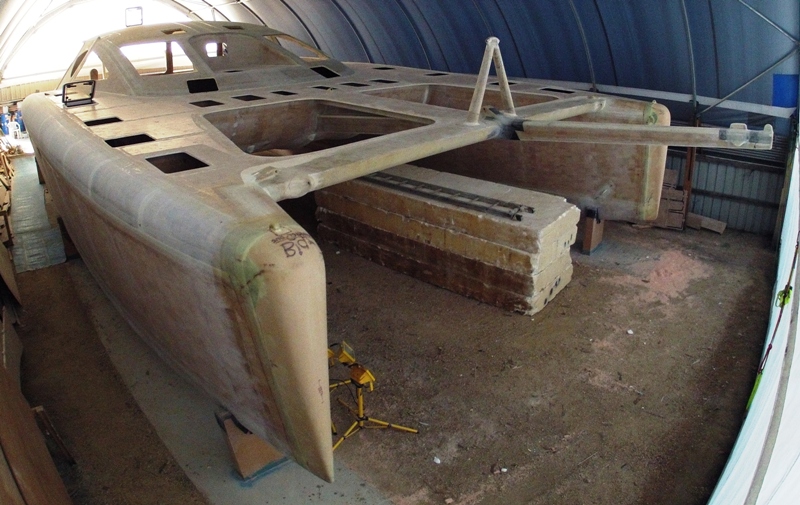
Back steps and engine hatches in, aft cockpit module and davits in place, work commenced on fitting out for the deck hardware. March 2013.
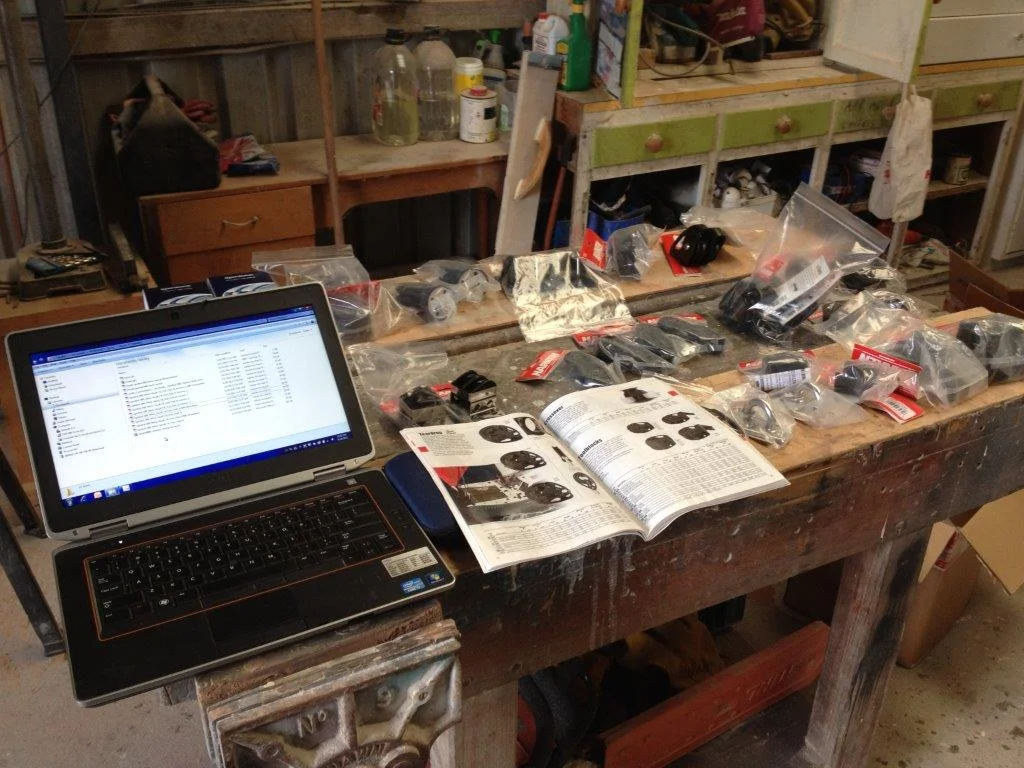
In order for ROAM to be easily and safely handled in all weather, a lot of planning and customization went into the deck layout and sail plan. Dedicated sheet routing for all sails, additional secondary winches on the side decks, adjustable headsail lead cars, and all furling lines lead aft are just a few of these features. Safety and efficiency does come at a cost... Sorting out the deck hardware in March 2013.
Laying out the deck hardware and marking out for the reinforcements and plinths. March 2013
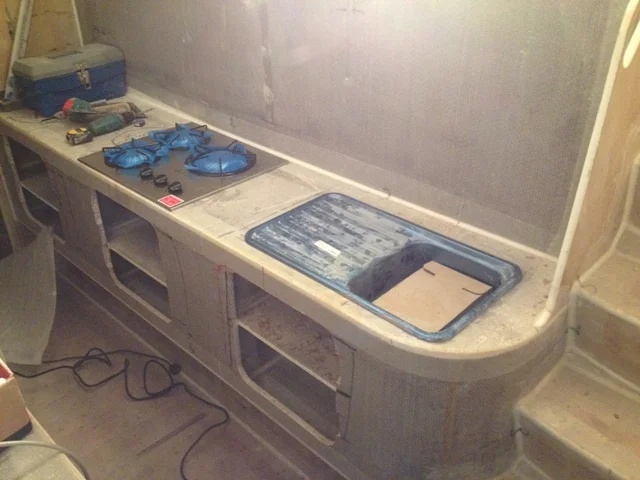
Galley fit out well underway. The choice of galley down was always part of our plan. Galley up for weekending and booze cruising, galley down for live aboard's. March 2013.
Russel Briggs from Mirror Image during his first visit. May 2013.
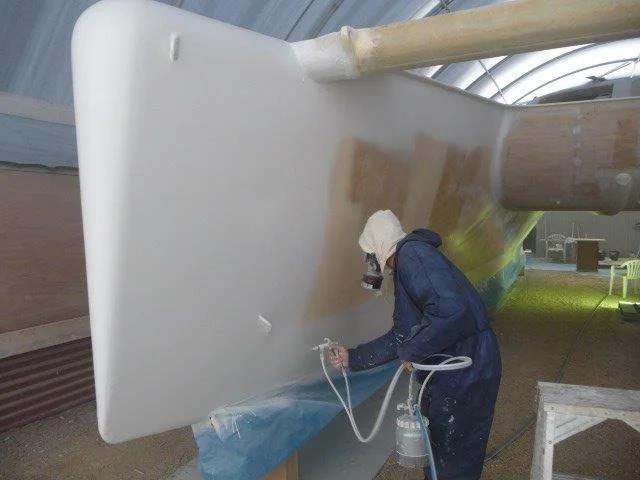
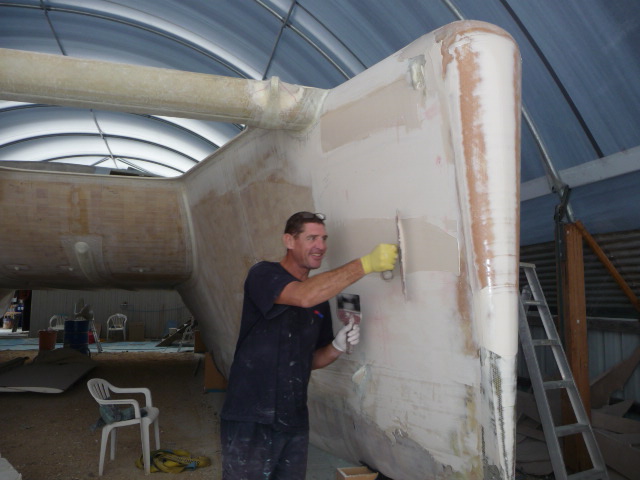
The first "shoot". Russel putting the stbd hull into "sprayable". In 5 weeks Russel and Michael got both hulls sealed, bogged, faired, spray faired and sprayed again with High Build Primer. May 2013.
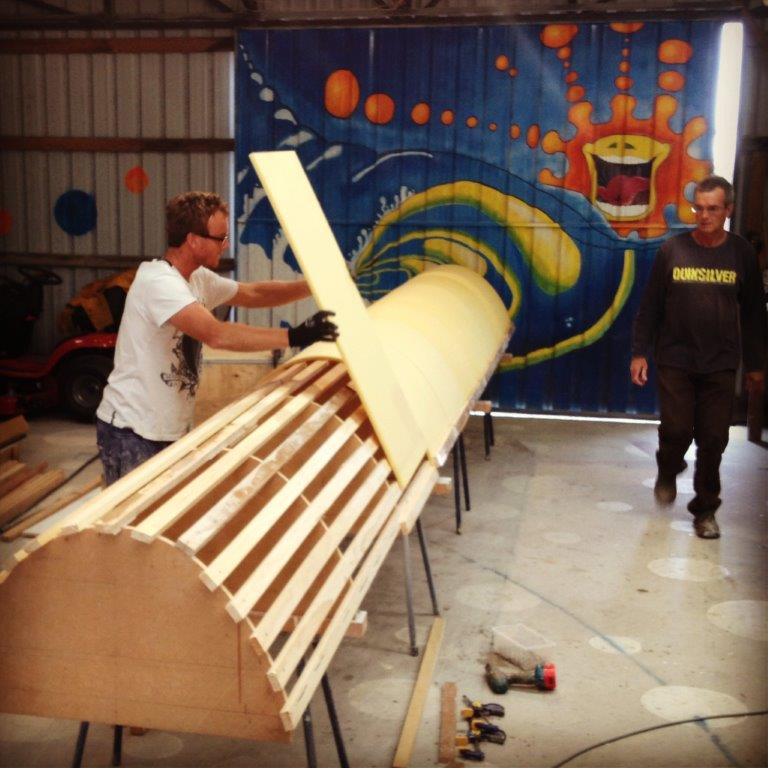
Michael and John start work on the boom. Here Michael is bending pre-heated foam around a frame in preparation for laminating schedule. February 2014.

The boom during a trial fit on the boat during fabrication to determine the final design. February 2014.

The Mirror Image Team. Russel is joined by his wife Kat. Interior fairing coming along in March 2014.
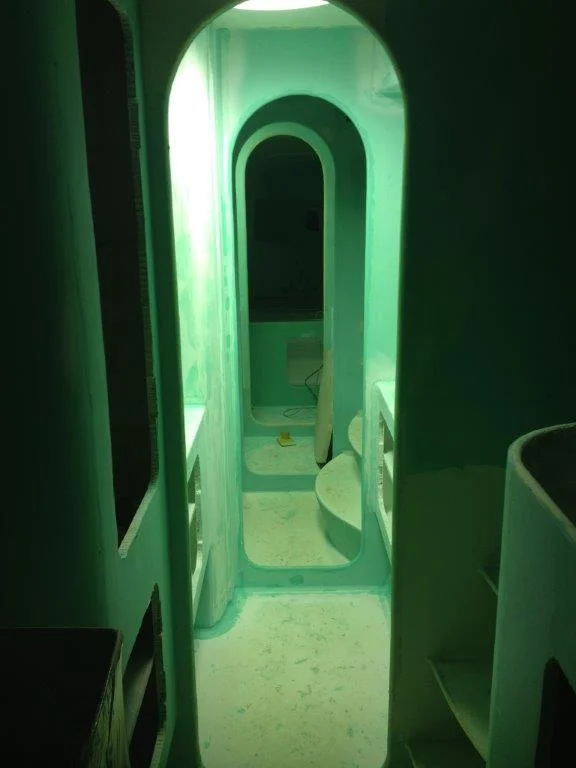
Interior fairing well underway. This is looking aft in the starboard hull. We moved to Jotun products at this stage. The 1:1 pre mixed Jotafair was found to be the most effective in producing a quality finish at a cost effective price however the world of paint systems is a complex one. We found getting consistent advice challenging as everyone has their preferred product and opinion. March 2014.
Saloon bog and fair stage drawing to a close. Only 3 more paint systems and 2 more full sanding processes to go... March 2014.
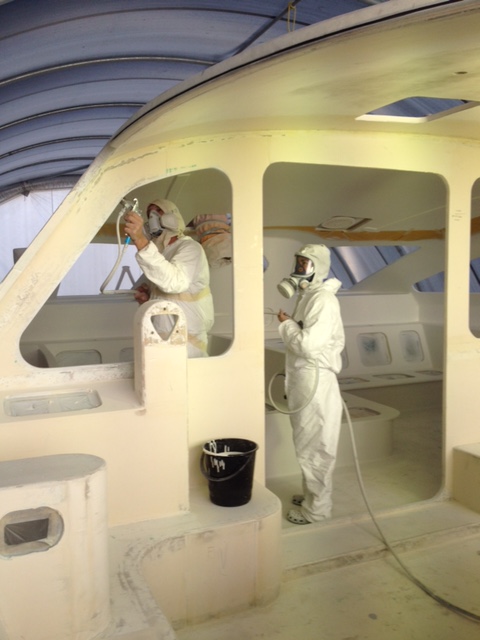
The Mirror Image crew spraying High Build Primer in the saloon of ROAM. March 2014.
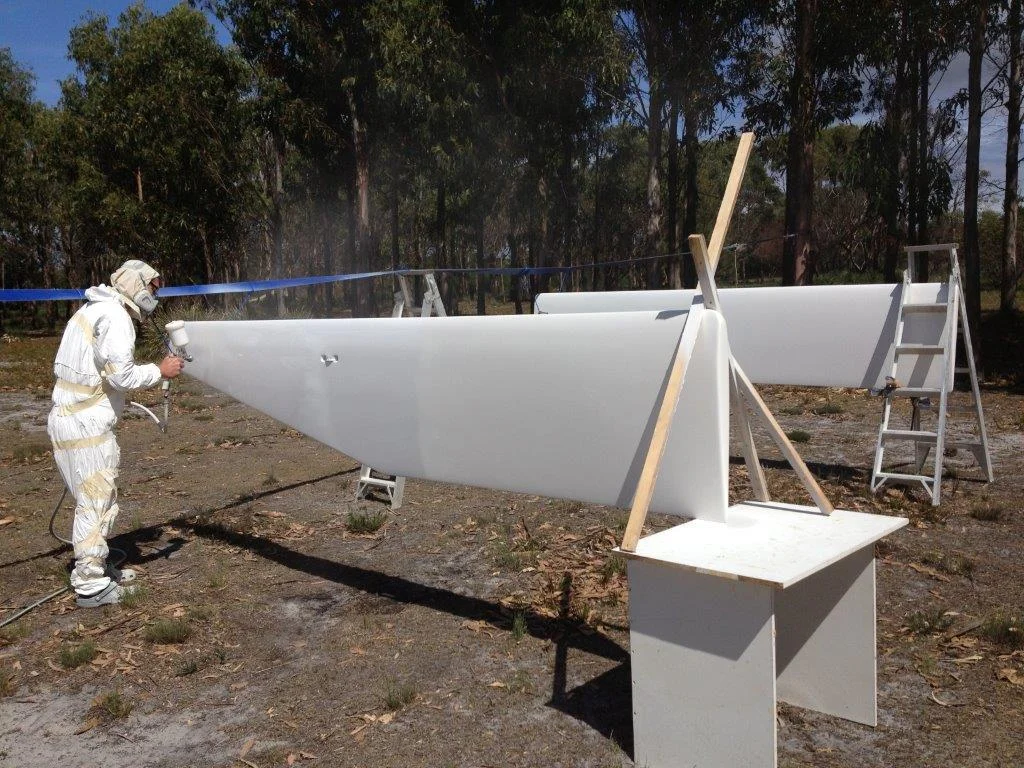
The first gloss shoot. Daggerboards are completed apart from applying antifoul paint to the lower half prior to launch. March 2014.
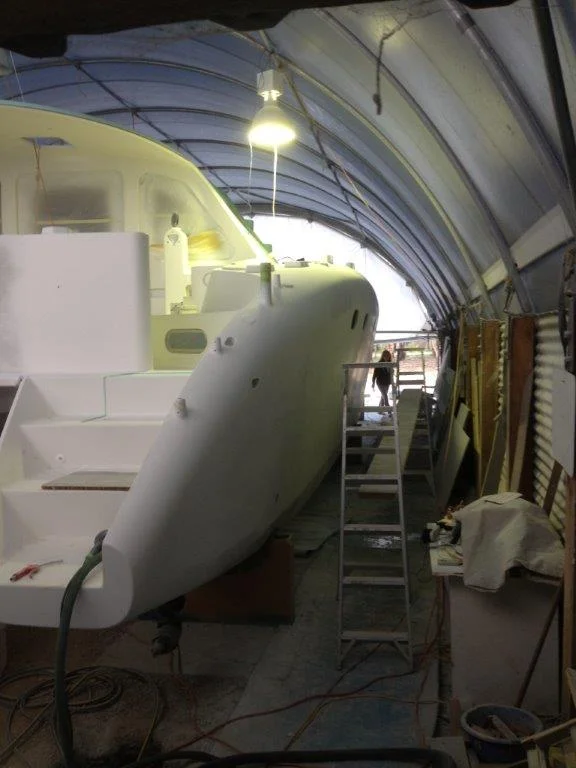
Working through the primer stages on the exterior. This slightly blurry photo helps to get a feel of the shed during this time. Dealing with dust a constant issue of the fairing process. September 2014.
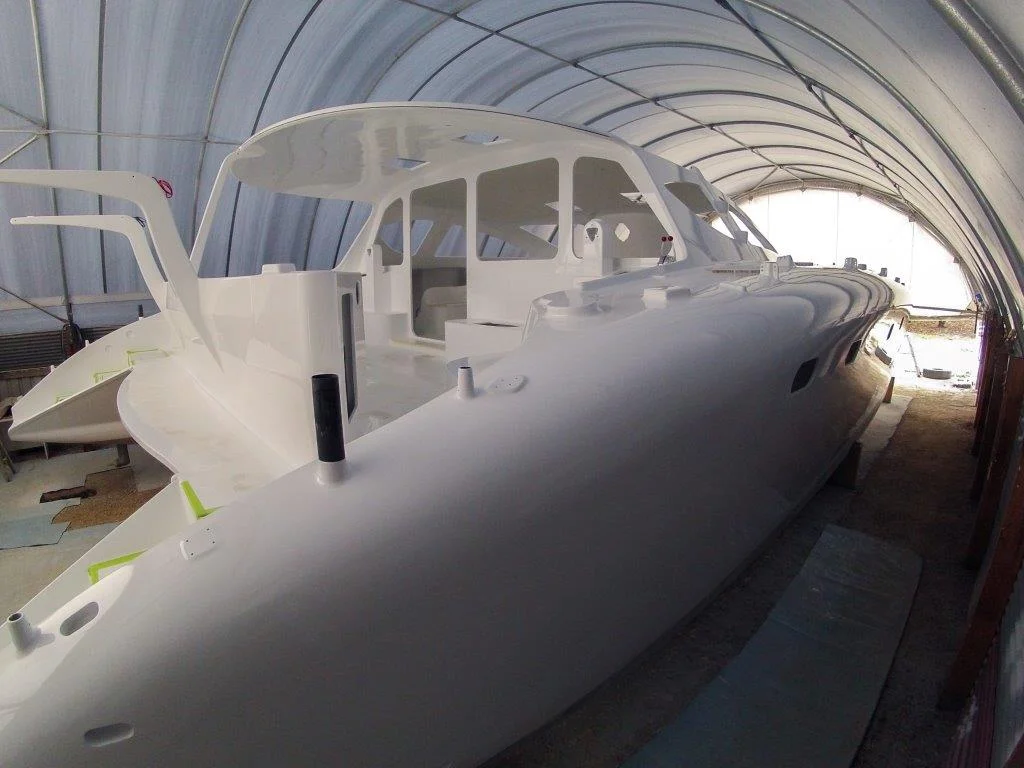
Nude boat! Spray painting complete. Getting to this stage is the milestone we worked so hard for, for so long. November 2014.
Fit out underway. ROAM is starting to look like a real boat by this stage. December 2014.
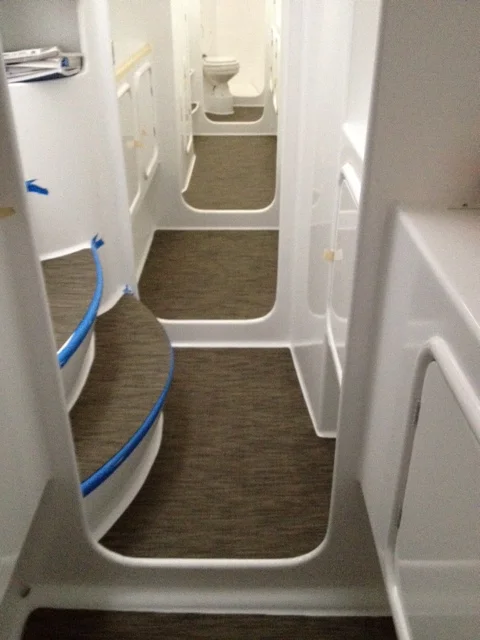
Flooring installation. January 2015.
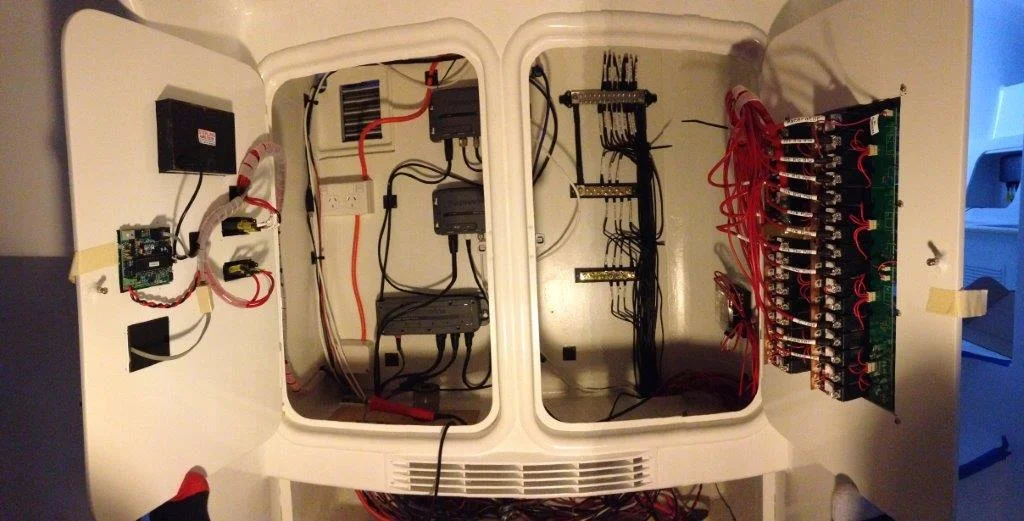
Nerve Center taking shape. ROAM is starting to come alive as systems are finished and tested. February 2015.
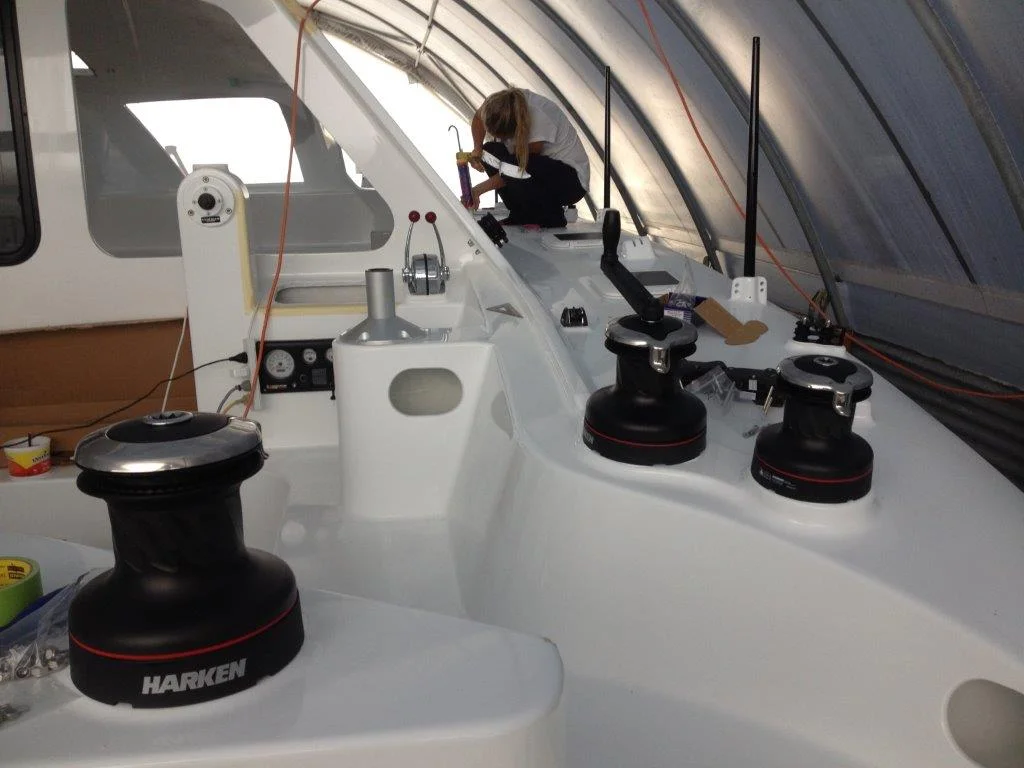
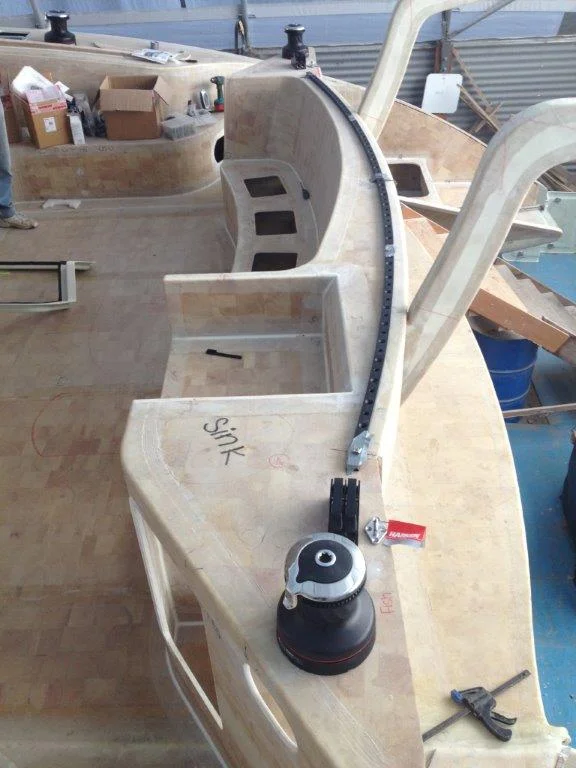
Deck hardware fit out. Roam features primary and secondary winches on the side decks to allow for controlled and safe sail handling. February 2015.
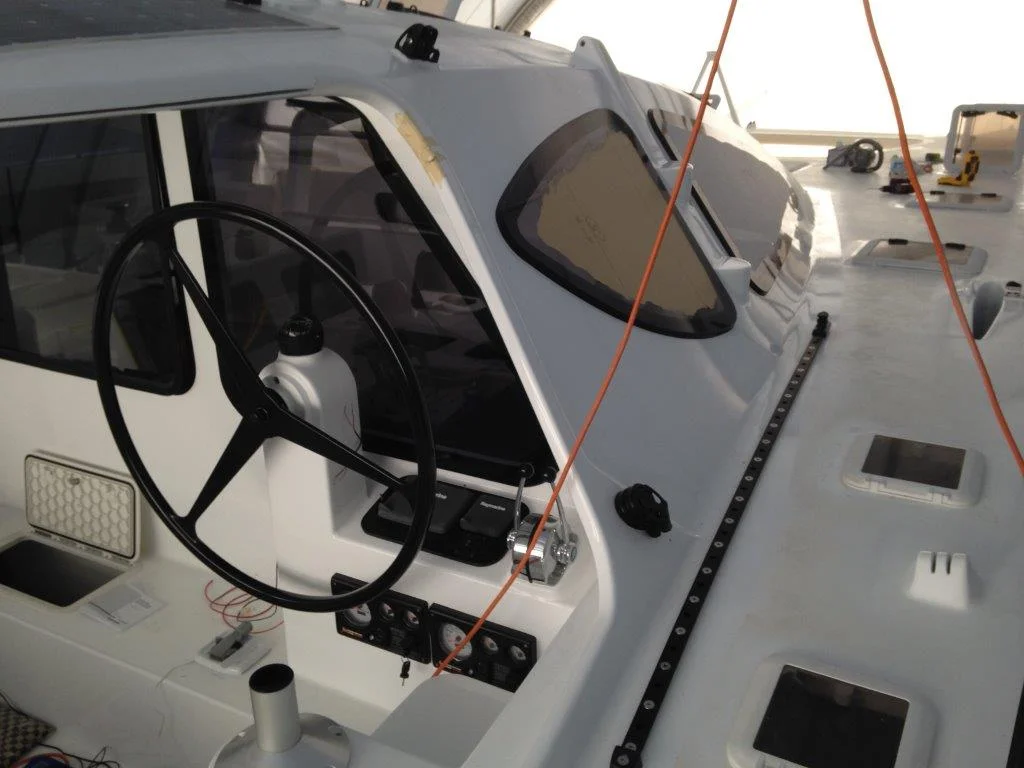
Cabin windows in. Non-skid left to do. ROAM finally reaches "Lock Up" stage. March 2015.
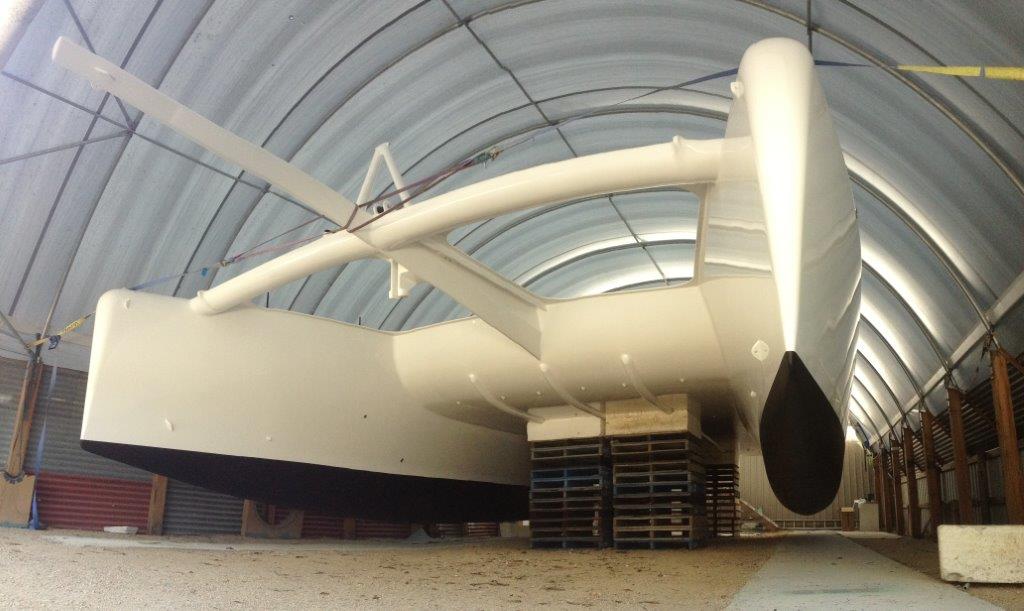
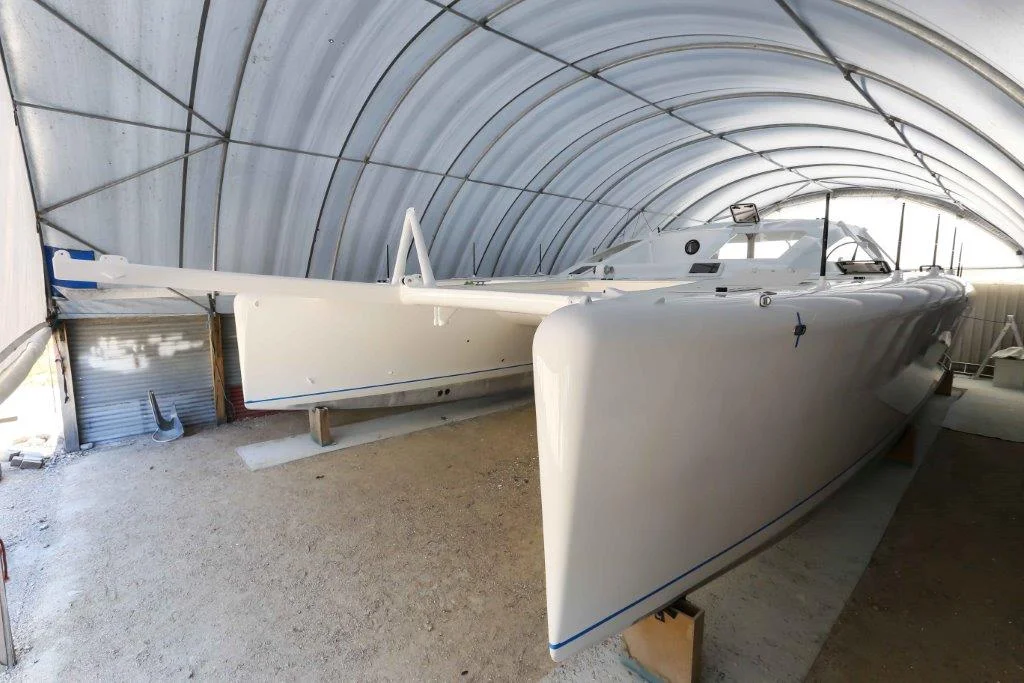
Antifoul on. ROAM is raised out of her cradles and supported under the bridgedeck to allow complete access to the hulls for primer and antifoul application. March 2015.
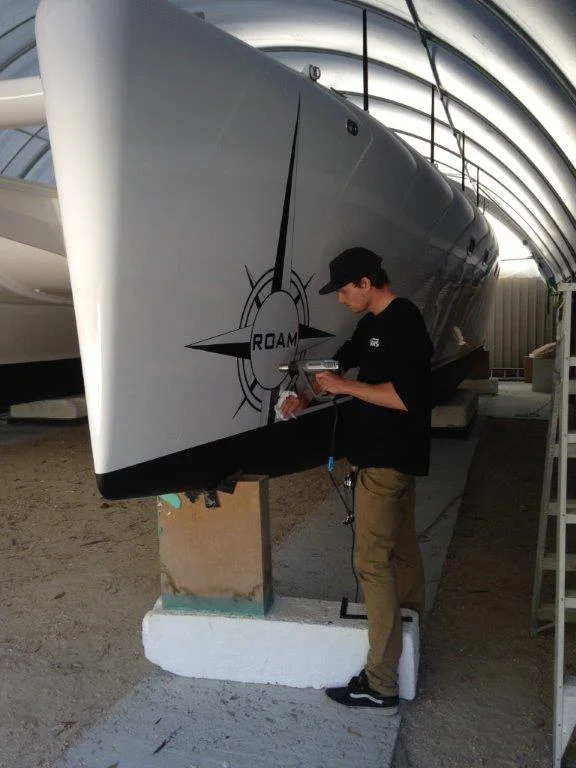
Decals installation. Will Bakker did an awesome job of producing and applying Michael's design to the boat. March 2015.
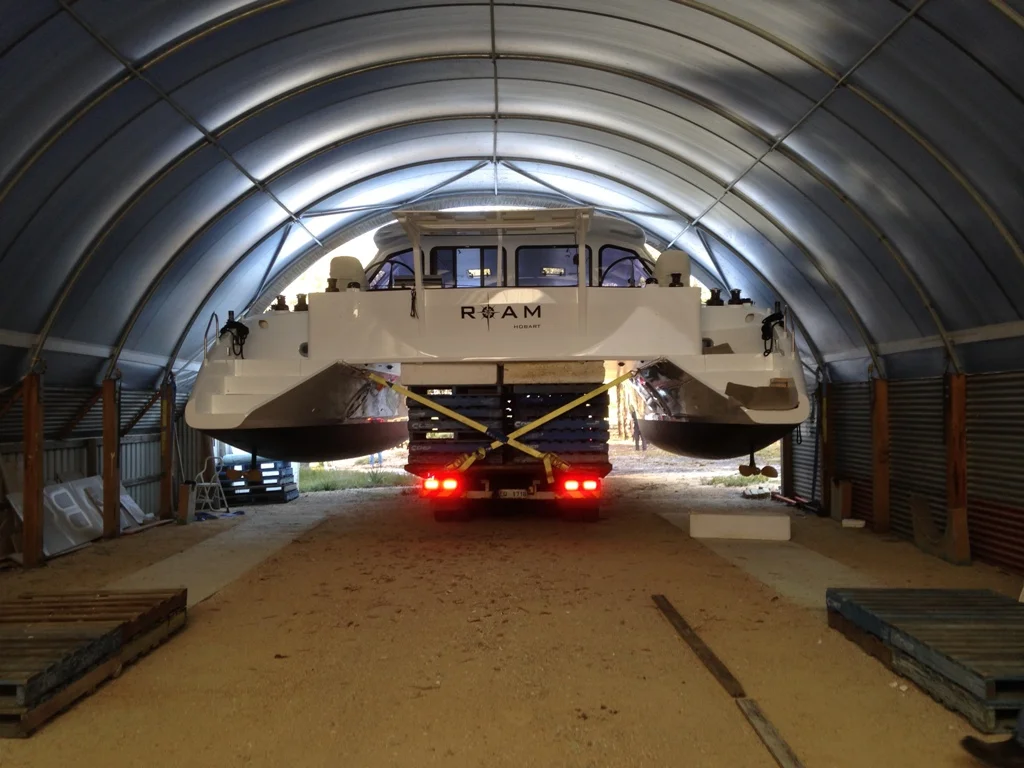
Rollout. ROAM is on the move for the first time loaded onto Kellara Transports trailer. April 2015.
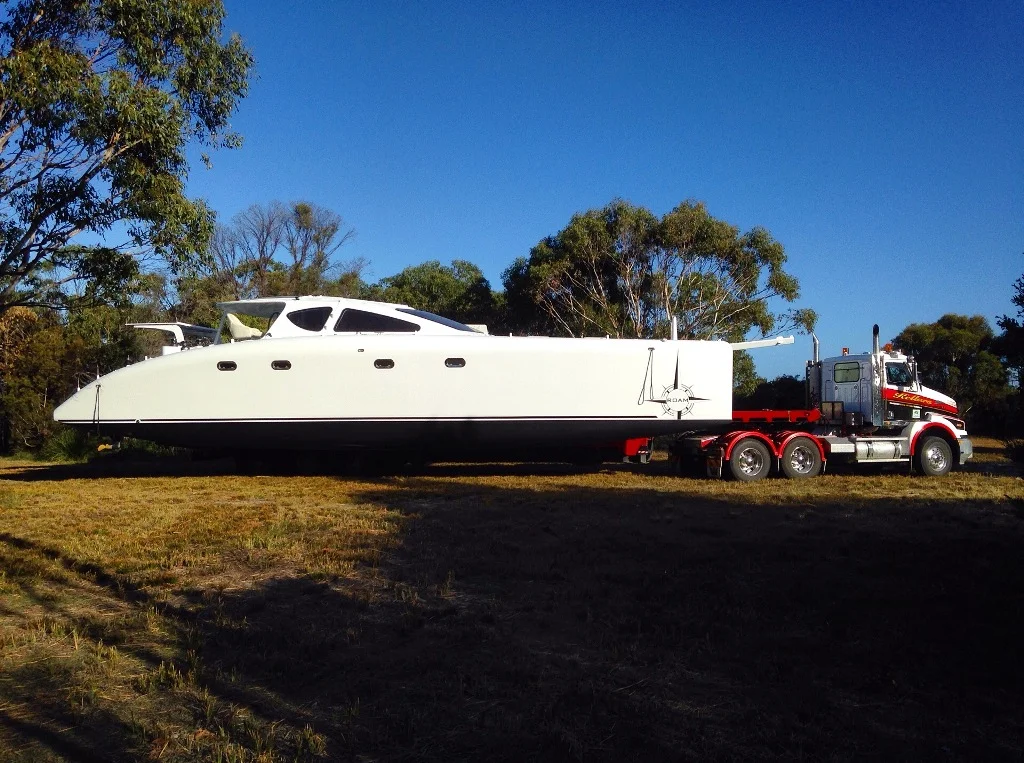
After working on the boat for so long inside the shed. To be able to step back and see the final product for the first time was amazing. April 2015.
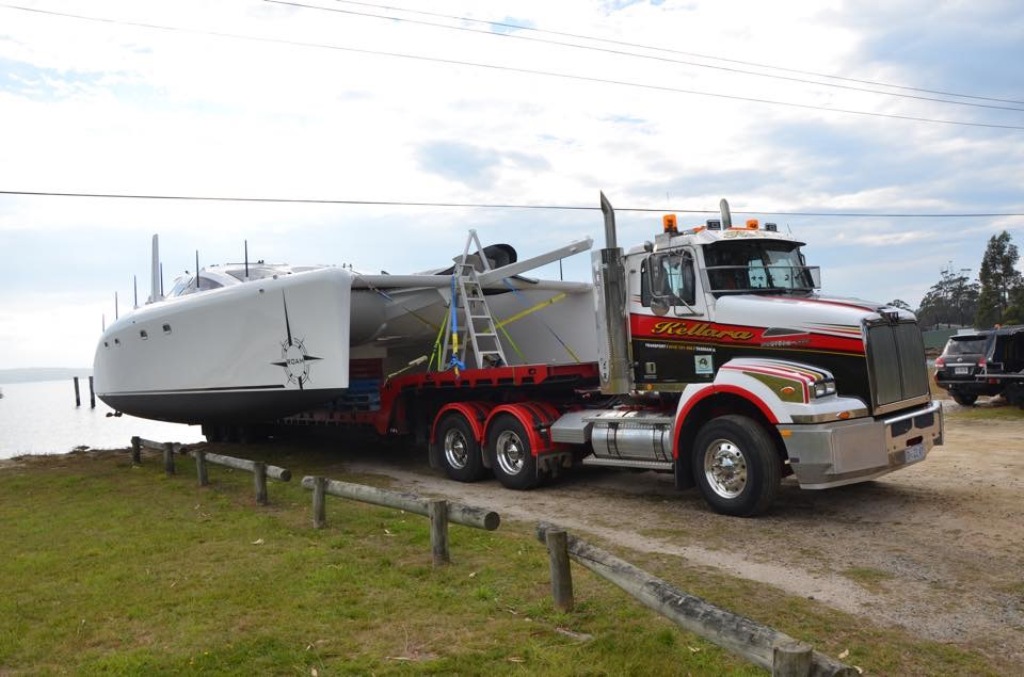
After the 8km trip from the build site to the water, ROAM awaits low water to be lowered onto the sand. The Road Transport permit required the boat to be off the road prior to first light. April 2015.

ROAM was launched without crane using Kellara Trasport's "tilt-slide" trailer. The small tides that exist on Tasmania's East Coast meant that the operation had to occur at the peak of the monthly tide cycle. Timing and placement of the boat on the beach was critical. April 2015.
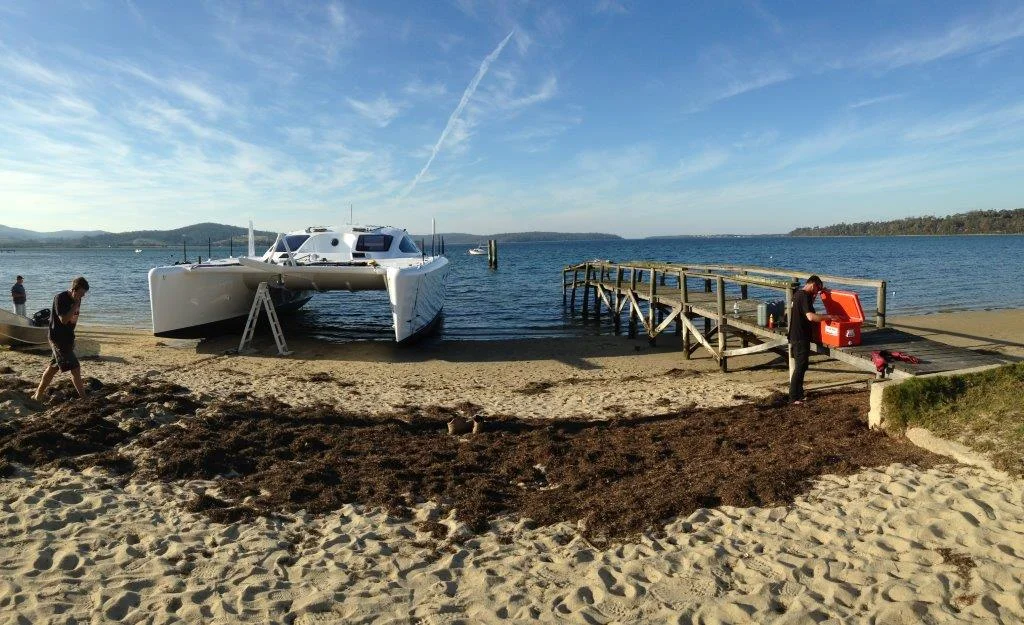
ROAM awaits the ocean to come and collect her as the tide fills in. The Launch Crew take break to enjoy the moment and prepare for the last stage of the procedure. April 2015.
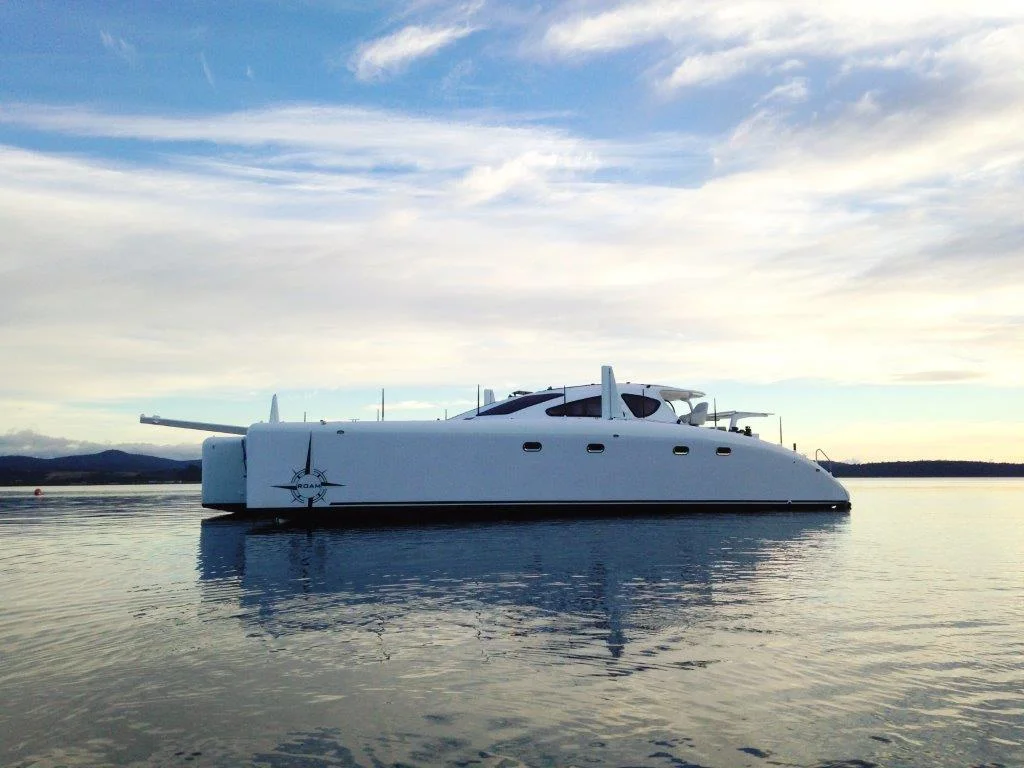
After the launch ROAM was secured to her mooring as darkness fell. This photo was taken as Andrew and Michael rowed away from the boat seeing her on the water for the first time. The photograph has been used by ATL Composites and Spirited Designs for advertising purposes. April 2015.
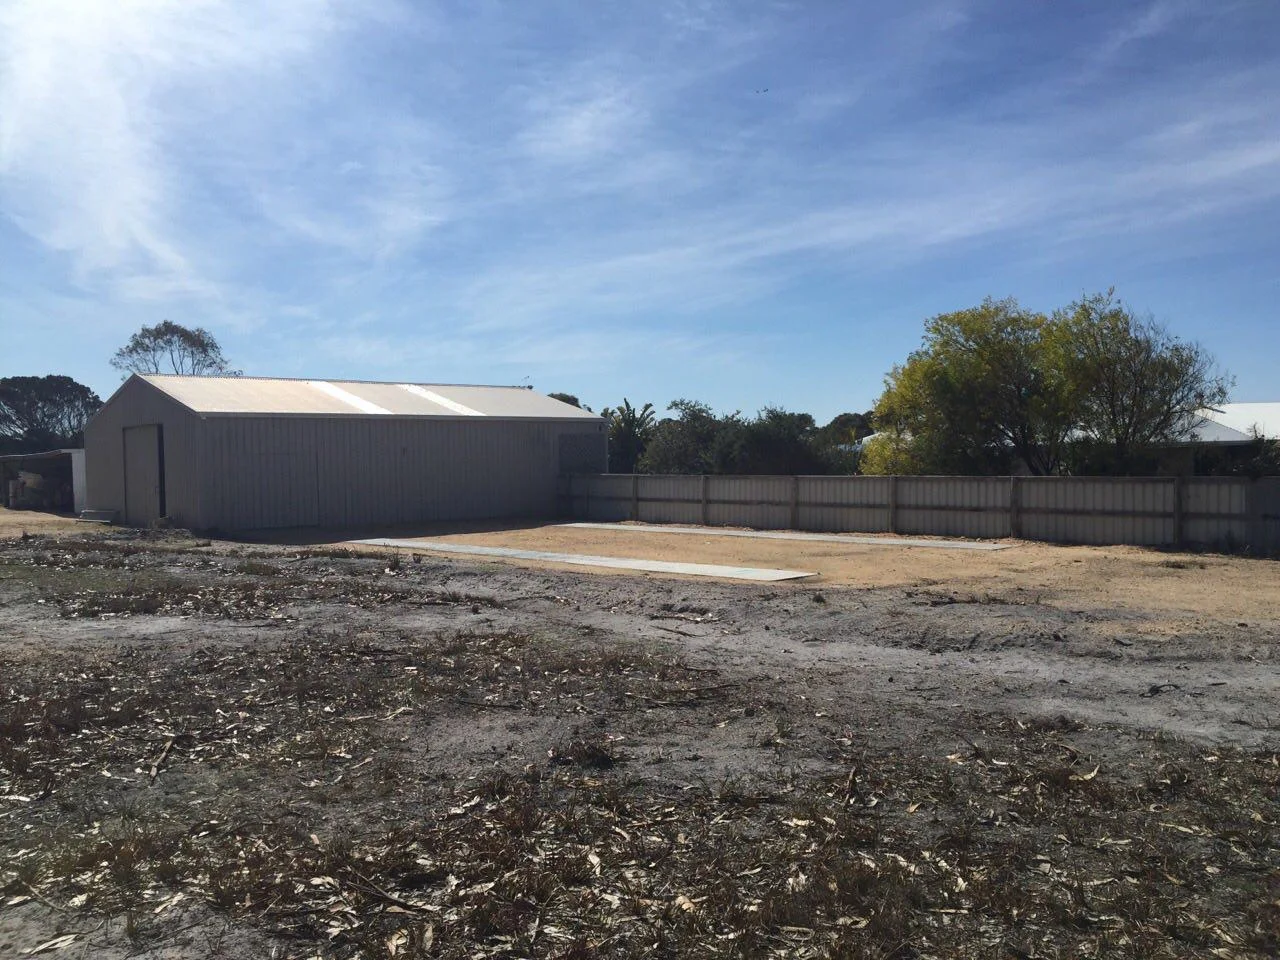
With ROAM gone the shed was removed in June 2015, after standing for 6 years and 7 months. The entrance between the build shed to John's workshop was closed and all that remains on site are the 2 concrete strips that the boat stood on. September 2015.
Design SPECS
- Official design specifications can be found at the Spirited Designs website here
- LOA : 14.74m/48ft
- BOA : 7.58m/24ft 8"
- Displacement : 8,000kgs
- Berths : 3 x Private Cabins
- Mast Height : 18.6m
- Power : 2 x 40hp Lombardini Sail Drives
- Motor Speed : 10.8/8.5knots Top/Cruise